Introduction to testing in Vitest

Lately I’ve been playing with Vitest - a testing framework for Javascript and TypeScript apps. I’ve been playing with the tool recently and I have been positively surprised with it’s capabilities.
Typically, you’d use Vitest for unit and component test testing, but there’s much more the tool offers. In this blogpost we’ll take a look at the different features and use cases.
Understanding the basics
If you have a background mostly in e2e testing as I do, you’ll quickly notice the main difference in the testing approach with a tool like Vitest. In end-to-end testing, you start by opening the app in the browser and following a particular user story. With Vitest, your test focuses on a specific part of your app. This part can be a component, a function or something else. The approach is usually to import that chunk of your application into a test, and verify different scenarios in isolation.
As an example I will be using a simple status page application written in Next.js. The application displays current status of a system and a list of historical statuses.

Inside this application I have a function that returns a color based on the status of a service.
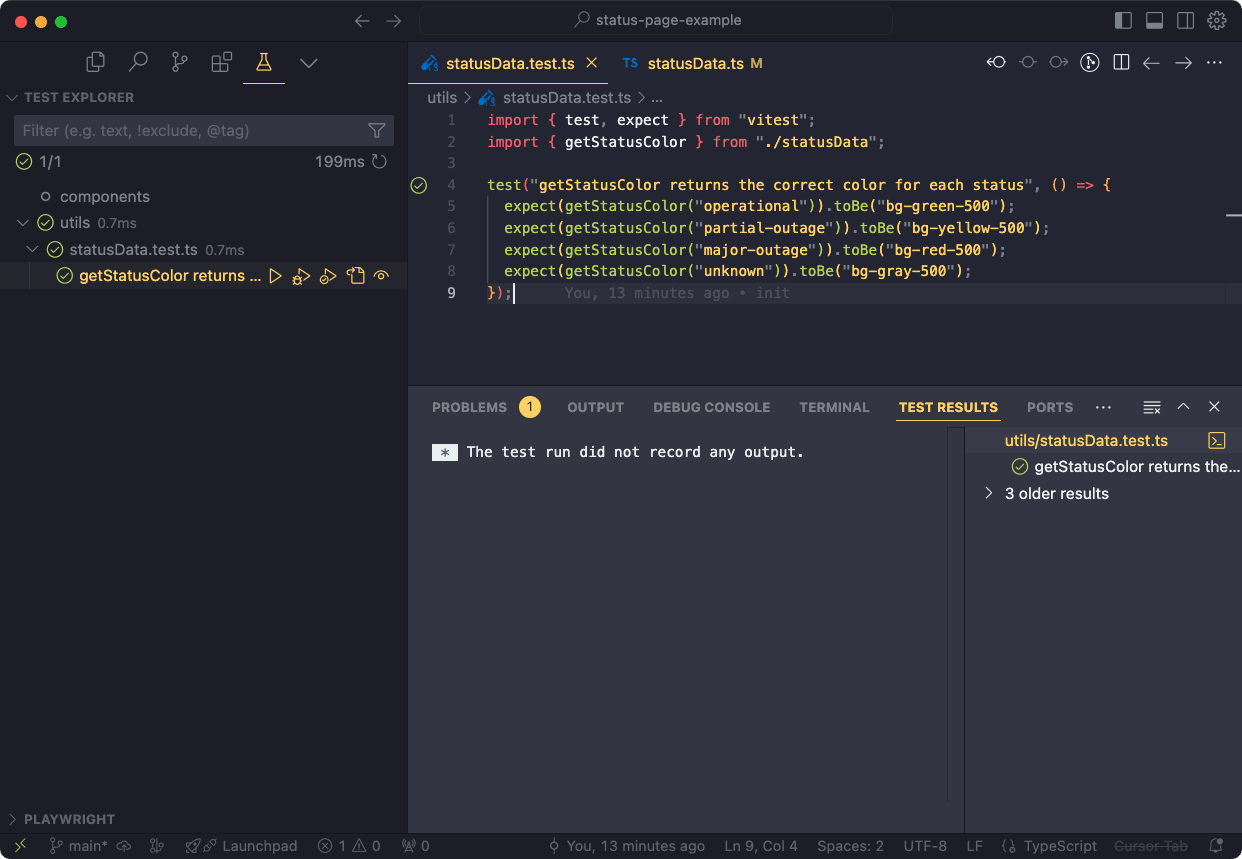
My testing goal would be to make sure that the function returns the correct color for each status. The test in Vitest would look like this:
The test simply verifies every possible case for this function and verifies that the return value is what we expect. For a simple function like this, the test feels simplistic, but these kinds of tests start to bring more value once we need to deal with multiple functions, imports, or once we refactor existing functionality.
Running tests
There are couple of way to run the tests. The simplest one is to use command line:
If you are using VS Code or Cursor, there’s an extention tha allows you to run your test right inside your code editor. There’s support for other editors as well.

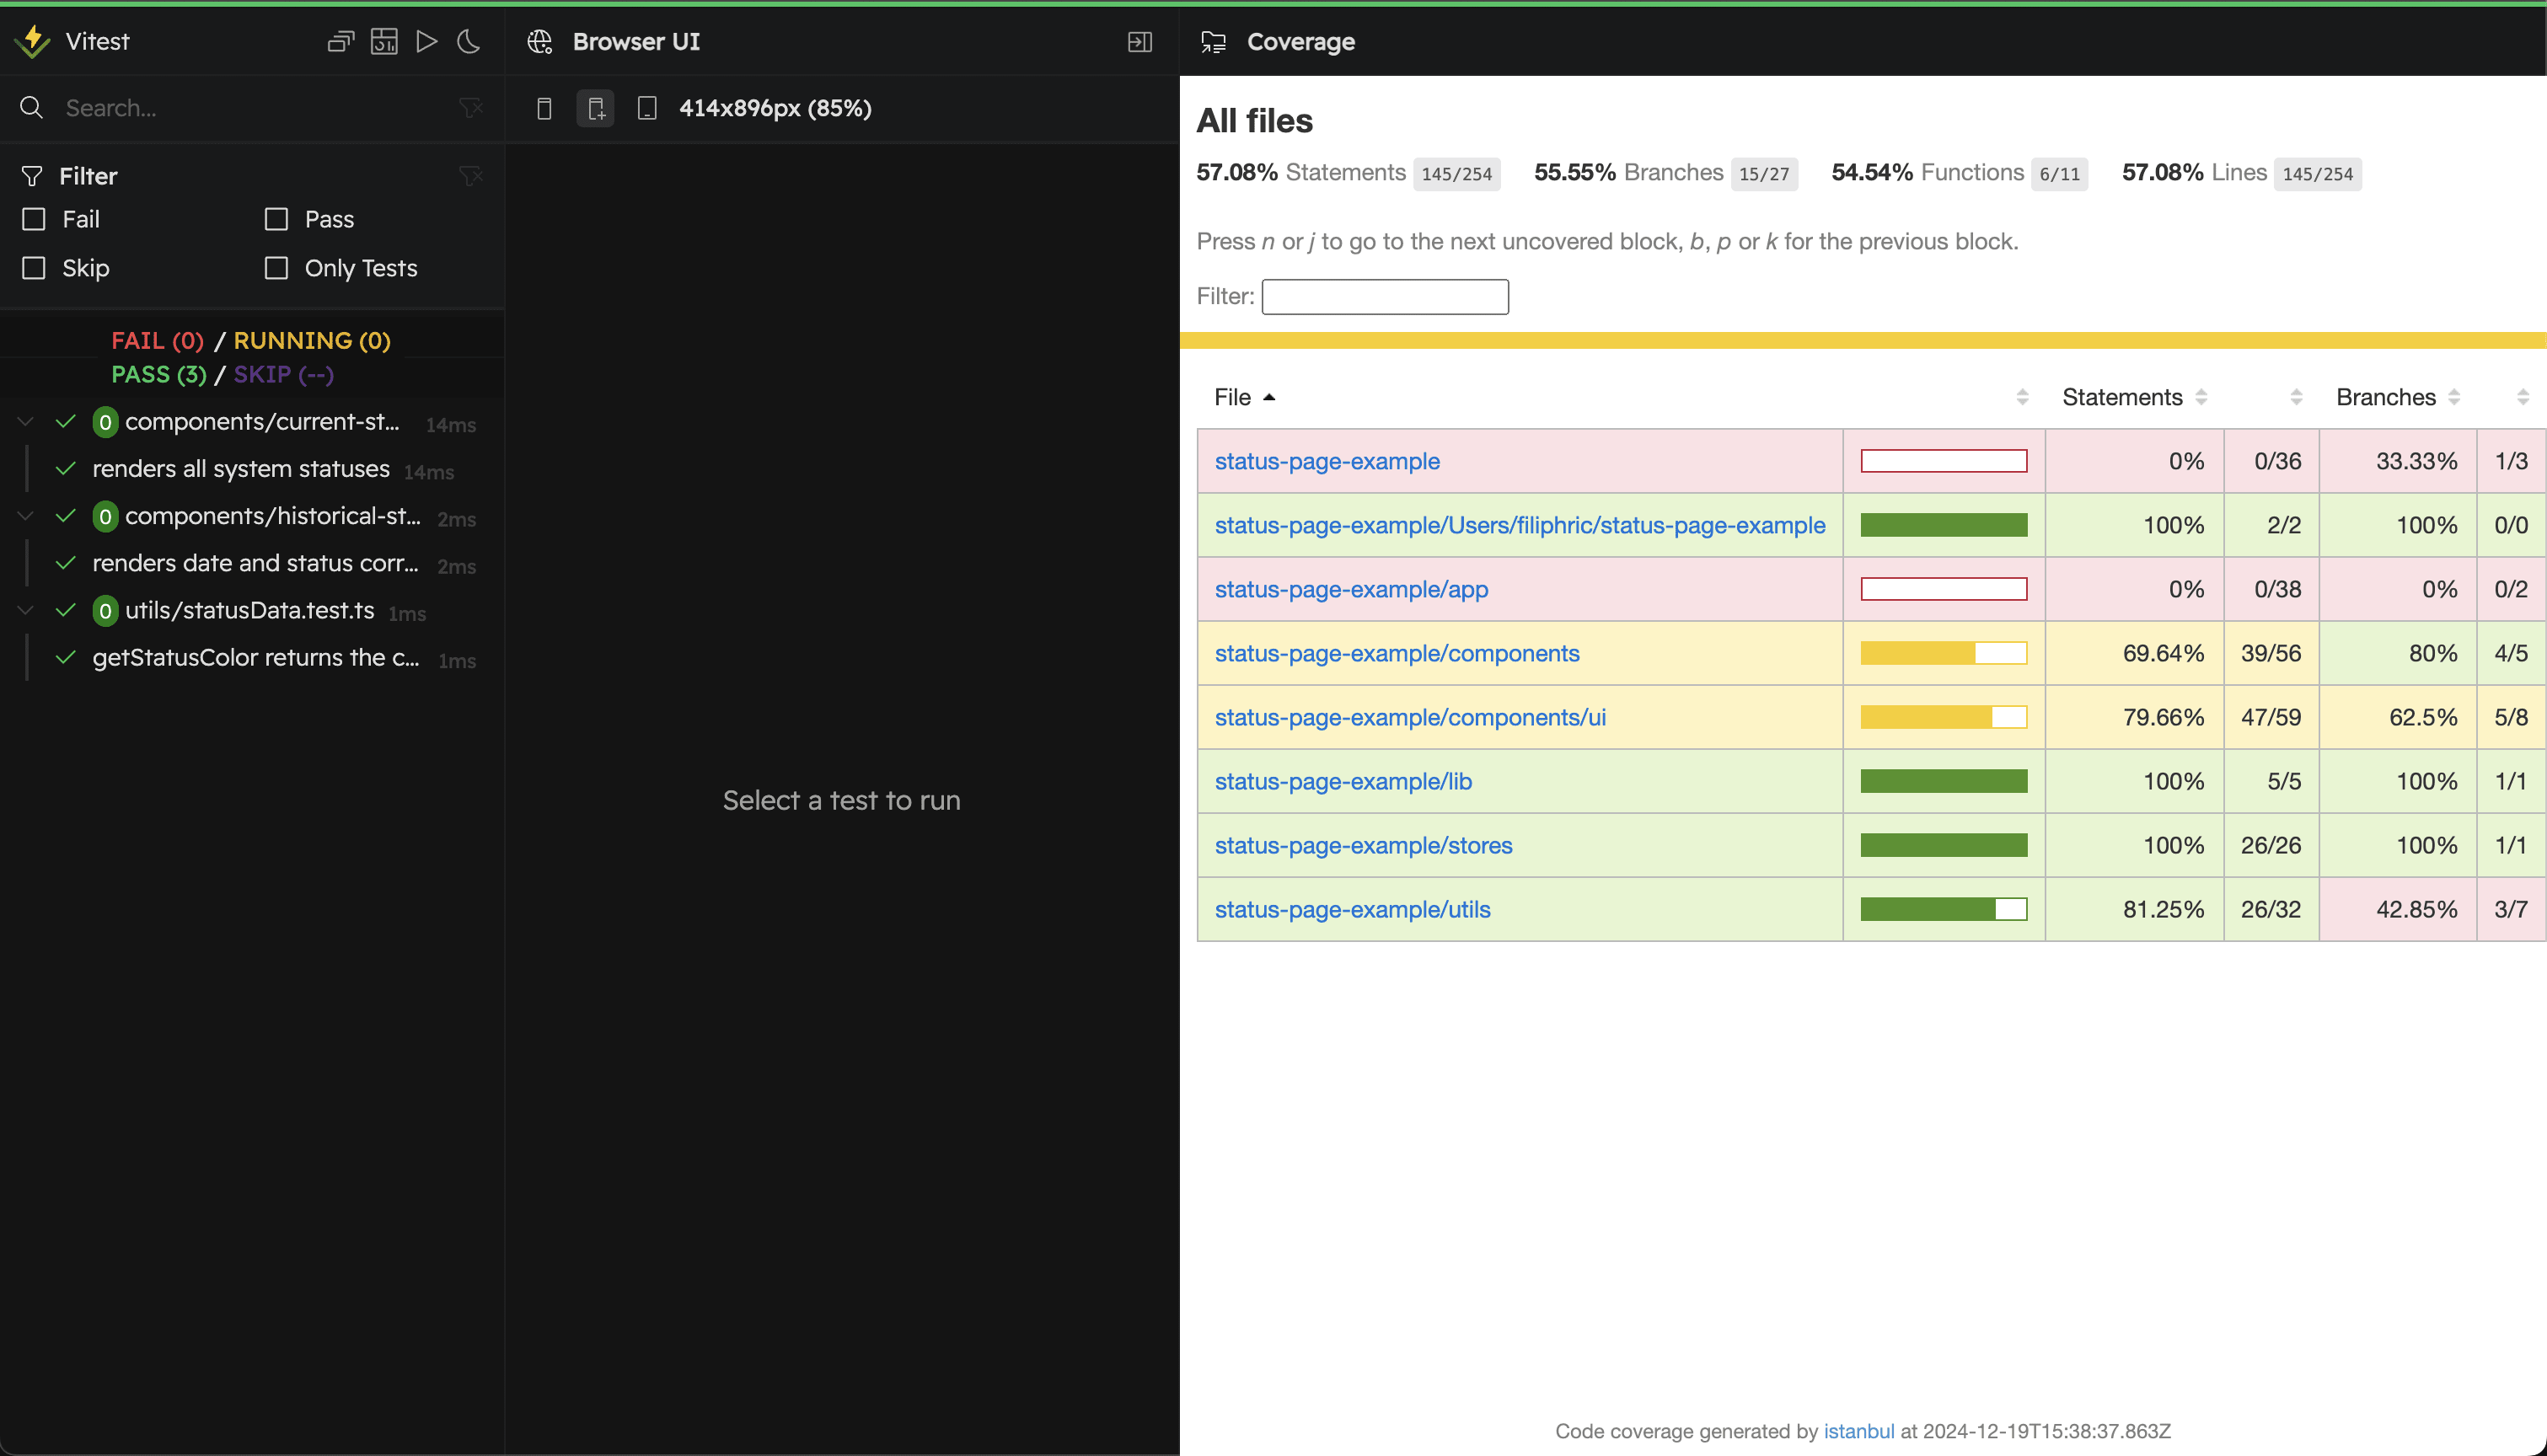
Vitest also comes with a very handy UI mode, that contains a dashboard for all your tests. You can run it by typing the following into the command line:
 UI mode automatically runs in watch mode, so that anytime you change the test or the source file, test will re-run and give you immediate feedback.
Testing components
In the same way as you test your functions, you can test your components. Let’s take a look at a component that implements these colors and contains a bit more logic. Here’s an example of a component that renders individual list item. The important thing to point out here is that this components takes in a propert called item. Later we will want to make sure that it is properly handled.
There’s a little bit more that we need to do in order to test our component. In order to test it, we need to render it and properly set up. For that, we‘ll install a couple of utilities that will help us with that.
These utilities will expand capabilities of Vitest, add the proper testing environment and help us set up our components to be tested. Firstly, we need to add react plugin to the vitest.config.ts file, as well as set up the testing environment.
Now, everything is ready to write our test. We want to render our <HistoricalStatusItem /> component. As we mentioned, this component requires data to be passed in. We can simply create mock data item in our test, pass it into our component and make our assertions.
Once we create multiple component tests, it may be worth moving some of the common stuff into its own file. A typical example of this would be @testing-library/jest-dom import, that will be needed everytime we want to work with a DOM element. We can move that import into vitest.setup.ts file and add it as a setup file to our config.
Components with managed state
Testing components that use state management can be a bit trickier. In this application, we're using Zustand for state management. The component displays system statuses taken from the store and displays it in a card layout:
To test this component, we need to mock the store. We don't want to rely on the actual state management in our tests. In many real-life scenarios, the state might not even be easily accessible. This is where Vitest's mocking capabilities come in handy.
We can use vi.mock(), to intercept the store import and provide our own data. We are simply passing our own mock data to what the component would normally receive from the store.
Our component would normally fetch the store data using useStatusStore hook, but in this case, we use vi.fn() to basically tell our component that this is what the useStatusStore hook now returns.
We then verify that all mocked data was properly rendered in the component.
This allows us to test how our component renders and behaves with different system states without needing to set up the entire state management infrastructure.
Browser mode
Vitest has another cool feature called browser mode. This is currently in an experimental stage, but it’s already quite capable. This takes component to another level, since you can render your components right inside the browser - and environment where they are supposed to be used.
You can even interact with the components using either Playwright or Webdriver.io. The instiallatioin is pretty straightforward and a nice CLI tool will guide you through the process after you run npx vitest init browser. This will install all the necessary dependencies and set up the config file for you.
Our test now needs a slight update so that it appears inside the browser page. We are simply locating the base element using page.elementLocator() and then using it to make assertions on the component.
When you now run Vitest in UI mode, you’ll now see a new section where you can view your component.

On first try, you might not see your styles, so updating your vitest.setup.ts file to include your css file might help.
Code coverage
I personally am a fan of code coverage. For me, code coverage is not about chasing numbers, but about revealing blind spots in your code. I’ve played quite a lot with code coverage in Cypress in the past.
The coolest thing about code coverage in Vitest is that there’s no app instrumentation needed. Vitest uses Chrome’s v8 coverage to generate the coverage report.
All you need to do is run your tests with the --coverage flag.
On first run this will prompt you to install @vitest/coverage-v8 package. Once you run your test a coverage report will be generated. It’s saved in the coverage folder, but it can be viewed directly in the UI mode.

Conclusion
I tried Vitest pretty much out of curiosity, but I was impressed by how easy it was to set up and how good the overall developer experience is. I’m really excited about the browser mode, which is blazingly fast. The fact that it uses Playwright to interact with the components carries a lot of potential in my view. The component and e2e testing gets a bit closer together. Combined with the code coverage, I think we might be looking at a very cool testing setup.
I’m looking forward to playing more with Vitest and seeing how it evolves.

